I enjoy a good, quiet, low-key New Year's Eve.
At home.
No driving around where you risk running into all the drunken fools who get behind the wheel of a car. Or all the loud parties and craziness. Or feeling the need to dress up and teeter around in high-heels all evening.
I prefer sitting around in comfy jeans and hanging with a few folks.
(Photo of chili at the 1/2 way point.)
So again, for this year, I'm making my award winning* turkey chili and Chris is making spicy, Mexican chorizo (and non-chorizo) queso dips. We're gonna eat, drink and play silly games. Some of us may last until the stroke of midnight ... others may head home early. Either way, good food and company will be had.
Here's to 2011! We hardly knew ya' ...
*Basic recipe was given to a former co-worker many, many moons ago who won a chili cook-off with it. She was kind enough to tell me about it. :)
HOWEVER it has since been "tweaked" and is even better than the original. I could SOOOO kick some chili cook-off ass with this stuff ...
Happy New Year to you!
Be safe.
Have a DD or call a cab.
Don't start 2012 dead.
It'll ruin your whole year ...
Saturday, December 31, 2011
Saturday, December 10, 2011
The Traveler
I was quite productive today.
My friend Suzanne came over for a little Soap Making 101. We whipped up some Lavender-Sage, Lemon-Sage, Green Tea & Honey, and Oatmeal & Honey soaps. I did a batch of Eucalyptus after she left. I was quite pleased to find a new supplier for the glycerin soap base. Saved me a little coin AND they do not feel the need to add antibacterial chemicals to it. Awesome.
THEN I whipped up a men's dop bag. I call it The Traveler.
Made from repurposed denim (i.e. jeans that ripped) and some pinstripe cotton for the lining. It's based up the Lawn Bag from 1-2-3 Sew. I had a happy accident while making the bag and I like how it turned out. The fabric tabs are different from the pattern and so the construction had to change slightly. All in all, I think it's a great bag for a dude to take whilst traveling. Gotta store your toothbrush somewhere!
And, yes, some of the bars of soap say "Mott's" on them. I like to use disposable containers as soap molds. They can be used a few times before they crack and need to hit the recycle bin. So they get to have more than a "use once and toss" kind of life.
Repurpose, people! THEN recycle!
Sunday, December 4, 2011
Flame On!
Since the young recipient of this Christmas gift is not regular reader of my blog, I feel safe in posting a quick tutorial for you all and giving you a peek at what I'm working on.
THIS is one of the easiest kid or baby blankets you can make.
Ever.
If you can sew in a straight line, you can make this blanket.
Here's what you need*:
1 and 1/3 yard - printed quilting cotton (42" wide)
1 and 1/3 yard - coordinating solid color fleece (60" wide)
coordinating or contrast thread
basic sewing supplies
After shrinkage, truing the fabric and what-not, this blanket finished to approximately 40" x 43" in size.
1) Launder all fabrics according to care instructions.
2) Iron your printed fabric and fold in half along selvage, then in half again. You're going to have to "true" the fabric before sewing. Especially if the awesome fabric cutter at your local big-box craft store cuts the fabric as such:
Seriously? Straight lines. Ever heard of 'em?
Anyway ...
3) Using your favorite method, "true" your printed fabric to make straight edges and nice, square corners.
4) Yes, your fleece will be quite a bit larger than the printed piece. I'm getting to that.
5) Align one of your now straight edges of the printed fabric with one of the selvage edges of the fleece, right sides facing.
6) Pin at center of edges and working your way outward to the corners, pin every 2" or so. Smooth your fabric as you go! The cotton and the fleece will want to cling together. You want to make sure there are no wrinkles as you pin.
6) After getting one edge aligned and pinned, begin working down one of the side edges the same way. Go back and do the other side before doing the bottom edge.
7) Yes, you're going to have extra fabric along the other 3 edges. This will be trimmed later. Keep smoothing out your fabrics as you pin!
8) When you do the bottom edge, leave at least a 10" section in the middle unpinned as you will use this hole to turn your blanket right side out. Mark the beginning and ending of the opening with two pins so you will know where to start and stop your stitching (see below)
9) Trim up the fleece to match the cotton print.
10) Stitch around the blanket, from double pin to double pin, with 1/4 inch seam allowance. Don't forget to backstitch where you start and stop!
11) Trim your corners and turn right side out through the opening. Using a pencil, point turner, or, if you have pointy pinkies like me, a finger, poke out your corners nice and sharp.
12) Since the fleece can be a little slippery, you're going to have to pin your edges again before top stitching. Don't forget to turn your seam allowances in and pin the opening closed. Like this:
13) Beginning in one corner, top stitch all the way around the blanket, approximately 1/8" to 1/4" away from edge.
Poof! You're done!
Thought this was a fun fabric combo for an angst-y (or trying to be) pre-pubescent boy. I think he'll like the angry flames! Grrr! His younger brother is getting one made from the blue tiger stripe!
* If you're feeling fancy, you can use coordinating yarn to "tuft" the blanket. This keeps the layers from moving around too much, but isn't really necessary as the fleece and the cotton stick pretty well together. BUT the tufting does look nice. I just didn't like it with this print. Did some other blankets with my cousin (for her girls) and we tufted with yarn in the center of the flowers on the prints we used. Looked nice.
THIS is one of the easiest kid or baby blankets you can make.
Ever.
If you can sew in a straight line, you can make this blanket.
Here's what you need*:
1 and 1/3 yard - printed quilting cotton (42" wide)
1 and 1/3 yard - coordinating solid color fleece (60" wide)
coordinating or contrast thread
basic sewing supplies
After shrinkage, truing the fabric and what-not, this blanket finished to approximately 40" x 43" in size.
1) Launder all fabrics according to care instructions.
2) Iron your printed fabric and fold in half along selvage, then in half again. You're going to have to "true" the fabric before sewing. Especially if the awesome fabric cutter at your local big-box craft store cuts the fabric as such:
Seriously? Straight lines. Ever heard of 'em?
Anyway ...
3) Using your favorite method, "true" your printed fabric to make straight edges and nice, square corners.
4) Yes, your fleece will be quite a bit larger than the printed piece. I'm getting to that.
5) Align one of your now straight edges of the printed fabric with one of the selvage edges of the fleece, right sides facing.
6) Pin at center of edges and working your way outward to the corners, pin every 2" or so. Smooth your fabric as you go! The cotton and the fleece will want to cling together. You want to make sure there are no wrinkles as you pin.
6) After getting one edge aligned and pinned, begin working down one of the side edges the same way. Go back and do the other side before doing the bottom edge.
7) Yes, you're going to have extra fabric along the other 3 edges. This will be trimmed later. Keep smoothing out your fabrics as you pin!
8) When you do the bottom edge, leave at least a 10" section in the middle unpinned as you will use this hole to turn your blanket right side out. Mark the beginning and ending of the opening with two pins so you will know where to start and stop your stitching (see below)
9) Trim up the fleece to match the cotton print.
10) Stitch around the blanket, from double pin to double pin, with 1/4 inch seam allowance. Don't forget to backstitch where you start and stop!
11) Trim your corners and turn right side out through the opening. Using a pencil, point turner, or, if you have pointy pinkies like me, a finger, poke out your corners nice and sharp.
12) Since the fleece can be a little slippery, you're going to have to pin your edges again before top stitching. Don't forget to turn your seam allowances in and pin the opening closed. Like this:
13) Beginning in one corner, top stitch all the way around the blanket, approximately 1/8" to 1/4" away from edge.
Poof! You're done!
Thought this was a fun fabric combo for an angst-y (or trying to be) pre-pubescent boy. I think he'll like the angry flames! Grrr! His younger brother is getting one made from the blue tiger stripe!
* If you're feeling fancy, you can use coordinating yarn to "tuft" the blanket. This keeps the layers from moving around too much, but isn't really necessary as the fleece and the cotton stick pretty well together. BUT the tufting does look nice. I just didn't like it with this print. Did some other blankets with my cousin (for her girls) and we tufted with yarn in the center of the flowers on the prints we used. Looked nice.
Monday, November 28, 2011
Crunch Time
Monday, October 31, 2011
More Halloween Fun
Halloween is my favorite holiday.
Kids are encouraged to go door-to-door for free sugar.
AND they get to be superheroes or ghosts or goblins.
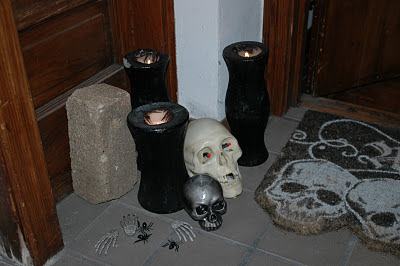
So here's some of what's awaiting tonights sugar-seekers:
THAT, my friends, is an authentic graveyard marker courtesy of someone who obtained it legitimately. I swear! AND so that you know I come by my craftiness honestly, the skull with glowing red eyes was made by my Dad ages ago. It has now transferred hands and is officially in my possession. (We used to put it inside my parents' mailbox with a sign that said "dead letters office". That was my idea.)
Check out the "bubbling" cauldron.
Full of BUBBLE gum! (I slay me!)
And who doesn't have skulls hanging in their tree?!?
Here is a copy of the invite I created for our Halloween Party. Lewis and Betty Lu Cipher were happy to see those who braved the Highway to Hell ...
Saturday, October 29, 2011
Monday, October 24, 2011
Taking Shape
Things are changing around here.
Furniture moving.
Vignettes arranging.
For instance ...
Not perfect yet. And has since been tweaked.
BUT Shiva seems to need a jungle. I think she likes it there.
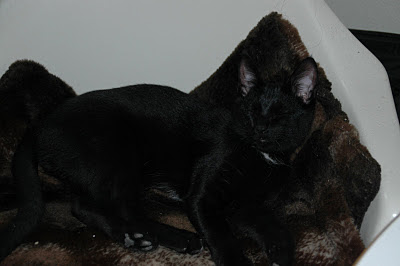
And poor Erebos. Too much excitement for him.
Couldn't even open his eyes for me.
And Marishi enjoyed the currently empty credenza top and an open window.
Laser eyes: engaged!
----
Apartment has been in a bit of chaos since my "roomie" moved in. As we have a bit of par-tay happening this weekend, it was a good kick in the pants to get more settled. It's all coming together ...
And soon, I shall share more pictures of home.
You know, when it's "perfect" ...
Yeah. Like THAT will ever happen! Maybe when it's presentable enough for my liking! Ha!
Tuesday, October 18, 2011
Happy Birthday, To Me!
Check it.
My sweetie bought me new dressmaker's shears and a yard of any fabric I wanted! I'd been eye-balling this Waverly at JoAnn's for a bit. (Shown at left.) And my bestie got me a new sewing box. Ain't it pretty?
Here's a better shot of the fabric. No idea what it will be yet. I'm leaning toward a tailored handbag of some sort ...
My bestie also got me a ham and some tailor's chalk. I got a gift card from my pops. I think Mom had to talk him into walking into a fabric store.
There were other bits-n-bobs, but these made up my "sewing stash" for today.
Oh. I did buy myself a spool holder. I forgot to take a pic of that. But it will make an appearance once I get it painted and hung on the wall. I'll do a whole shot of my sewing area then. When it's ready. :)
But for now ...
Happy birthday, to me! Happy birthday, to me! ...
Sunday, October 2, 2011
I'll Get You, My Little Pretty
Do you remember this scene from The Wizard of Oz?
Ahh, that beautiful poppy field!
Today, poppies are synonymous with opium and failed drug tests.
Let's face it, we've all eaten a poppy seed muffin and been like "oh, I hope they don't random drug test at work today!"
But the fact of the matter is, poppies are pretty!
... and so is my new tote bag!
I made this bag H-U-G-E!
I wanted to be able to tote some sewing stuff around.
Seriously, you can't tell the scale here, but this beast is like 21" tall and 15" wide. This behemoth holds almost everything I need!
And ...
... my first interior pocket!
I did not make my own handles/straps this time. I was anxious to get home for homemade pizza and I wanted to use up some woven strapping I had bought a while back.
Love it!
Saturday, October 1, 2011
The Amazing, Baking Cat
Did you know cats can make biscuits?!?! *
This is Erebos ... making biscuits one night before bed.
He's quite the biscuit maker.
* For those of you without cats or who are unfamiliar with the phrase "making biscuits", see this explanation from Wikipedia on "kneading". Or check out this cute video from Cute Overload. NOW you understand ...
And if you're wondering, that's him burying his head between a pillow and a fleecy blanket. He nurses on the blankie, too. Methinks my poor little guy was taken from his mommy too soon. That's why he was dodging cars in the middle of the street!
He's still a tiny guy. I don't think he's going to get very big.
But he is insane.
Like insane enough for three cats.
Seriously. He likes feet.
I *heart* Presents
... for other people.
Don't get me wrong -- we all like to receive gifts.
But I like giving them.
And I really like making them.
This bag was for Pat's birthday back in September.
(Crap. It's October already. How did THAT happen?!?!)
She is an ACTUAL quilter. So I "quilted" a couple of blocks for the front of the bag. I love making Wonky Blocks. They're so ... wonky!
And here is a close up of the random lines I stitched across the blocks.
As you can see, it's a nice, wide tote!
And THIS is what I stuffed it with!
Ah ... the joys of working part-time at my local LYS:
YARN DISCOUNTS!!!!
Pat also knits and crochets. I figured I should share the love and get her some fiber-y goodness, too!
Friday, September 30, 2011
Are My Pants On Fire?!?
I've been busy making stuff.
I swear!
(See, you're calling out "liar, liar..." right now, aren't you? You think my pants must be on fire. But they're not. Nope. No-sir-ee-Bob! I got stuff to show you!)
See this purse?
I whipped this up last weekend.
I thought this fabric was so obnoxious. So, of course, I had to have it.
Purse is lined with turquoise. I drafted a pattern -- it still needs some tweaking -- but overall, I'm pleased with how it turned out. (And yes, those are my customary trademark patches on the handles.) Installed my first ever pleats at the top!
Love it!
PS - I have more to post. I'm going to see if I can "schedule" them through Blogger. But last time I tried that, scheduling wasn't working. So they may get posted as I write them!
Sunday, September 18, 2011
The Mehs
... I has 'em.
Mostly because of a lovely infection/virus that is still lingering, I just haven't wanted to do NUTHIN'!
I take that back ... I DO want to do stuff. I just don't have the energy. The ginormous antibiotics are sucking that from me. Hopefully in a few more days, I can get back to sewing or crocheting or ANYTHING!
Oh. And it's been raining all day. That made me want to lounge around all day, watching things on the Roku. I *heart* instant streaming. It's been a Star Trek TNG day around here! :)
BUT with rains come pretty pictures like this:
This wasn't taken today. Too rainy. I took this a few weeks ago after some much needed rain. Look at that sky! Love all the pinks and purples and blues ... all the ripples.
So lovely.
Oh. I DID crochet a new Mobius Cowl. Wrote up my pattern finally. Having another crocheter test it now to see if it makes sense in written form. The technique is a little different. Might be leading a CAL at my LYS.
Translation for non-yarn folk: ...a crochet-a-long at my local yarn shop.
Now ... back to the Roku.
Sunday, September 11, 2011
Barrel (Bag) of Monkeys
This little Bag O' Monkeys was made for the newly Doctorated Kelly.
(I know that "doctorated" isn't a word. I'm blaming it on the 101.3 degree fever I'm running right now ... )
It's based on this pattern from Martha Stewart. I've used it twice before. I love the fact that it's reversible, but the small handle is a bit of pain. Even with a free-arm sewing machine.
I made some changes ... used some mid-weight fusible lining in the handles to give it more "oomph". I found that mine stretched out a little too much and I think this will eliminate that problem. Made it a bit stiff, but it's all washable so it will probably soften up. Also, I tried cutting the pattern about a 1/2" larger all around to see if that would allow a little more room when stitching that smaller handle. That didn't really do much in that department, but it still turned out cute! The fabric totally reminds me of the Barrel of Monkeys monkeys, with their cute little interlocking tails!
Monday, August 29, 2011
What a Dish (Mat)!
I stumbled across a simple DIY dish drying mat while perusing Craft Gossip. The tutorial was from B is for Boy Creations. I thought it was pretty frickin' clever.
As someone without a dishwasher, I frequently need more room than the average dish drainer can hold. My mom is in the same boat. While I just throw down a tea towel and hope not to chip a glass on the cast iron drainboard, my mom has bought numerous items trying to resolve it. The most recent worked ... aside from the mildew that was being "trapped" between the rubbery backing and the mat. (Was NOT supposed to let moisture through...liars.)
So I thought THESE would be perfect! Easy, pretty AND functional!
I skipped the basting spray (mostly because I couldn't find any such thing) and used bias tape to bind as I don't own a surger. I like how they turned out. I trimmed off the short ends -- one all the way past the decorative ribbing. Just pinned the flannel and towel together (wrong sides facing) with the bias tape and POOF! Zip, zip, ZIP!
Super easy! I made a pair for her using two hand towels, less than 1 yard of flannel and about 1 1/2 packages of double fold bias tape. Totally machine washable.
Now ... wait until I get around to mine! :)
Tuesday, August 23, 2011
Terra-estrial
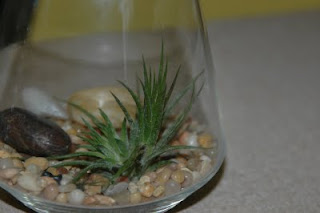
Tiny Terrariums.
Gidget-size Greenhouses.
We made 'em.
Check out the handiwork of The Community Crafts Studio...
We took these things:
And made THESE things:
(This is the work of Linda B. ...I think)
(This is Bobbie's)
(Cara made this one)
(This contains one of my many Buddhas. I love Buddha.)
(Chris worked really hard on this one. Spent lots of time getting that plant situated J-U-S-T right)
(Cara made this one, too)
(Made by Mom)
(...also by Mom)
(Pat constructed this one)
(...and this one)
(I didn't get a shot of Aurelia's so she had to upstage everyone with the gorgeous natural light ... sigh)
There were many others made. But my camera skills are still a work in progress, so it's not that the others weren't worth showing ... but the glare from the flash or my unsteady hand made the pictures unusable. My bad ...
But fun was had by all!
Subscribe to:
Posts (Atom)