So ... um ...
Sometimes you try something new and hey, it works really well.
Other times ...
DERP!
Yeah, dying some silk today. Decided to add some yarn to the bucket. No problem. Rinsed/washed the silk in the washing machine. Again, no problem. Did the yarn. Without. Thinking. It. Through.
Aaaannnndddd it wrapped around the agitator. Like, completely. Around. The. Agitator.
So somedays things go right.
And sometimes, not so much ...
* What's the DERP?! you ask? Check out answer #5 and #7 for the closest approximation of what I mean here.
** And the silk by the way is GORGEOUS! Can't post much more about it until after the holidays. Can't be previewing gifts this early! ;)
Sunday, December 9, 2012
Wednesday, December 5, 2012
Soapmaking Gets EPIC
What am I saying?!
Soapmaking is ALWAYS epic!
It's that time of the year when a girl's thoughts turn to ... good clean fun! (Yeah, I made "that" joke. You should know better by now ... silly readers!)
So, I gathered some gals (and guys!) for another annual soapmaking event at the Community Crafts Studio. Well, almost annual. Last year it was just Suzanne and I in my kitchen at home. But still fun! This year we had a group of ten or so.
Check out our workspace, all prepped and ready for class ...
I like to focus on pantry soaps, using herbs, honey, oats, essential oils -- many of which are found in your pantry!
AND I like to encourage the use of "repurposed" soap molds. Any flexible plastic containers that end up in your recycling bin are great! They can usually be used a few times before cracking and then can still end up in the recycling bin! But sometimes I have to supplement with containers found at the Dollar Store. Hey, they're still recyclable and can be used even longer than the others.
Using a glycerin, melt-and-pour soap base is super easy! Especially with microwaves and glass measuring cups!
Please ignore my unhealthy (but oh so tasty) iced soft drink there in the background. What can I say? Vice! Thy name is Dr. Pepper!
The above pic is kind of odd looking, I know. But its what a partial 25 lb. block of soap looks like. (Oh, I order in 25 lb. blocks, baby! I like a LOT of good clean fun!)
I'm not going to run through all specifics and "how to"s here*. You can find that all over the web and in crafty books. But I can say this, I recommend high-quality soap bases and natural ingredients. No synthetic fragrances here! Essential oils and dried herbs, baby! Better for you!
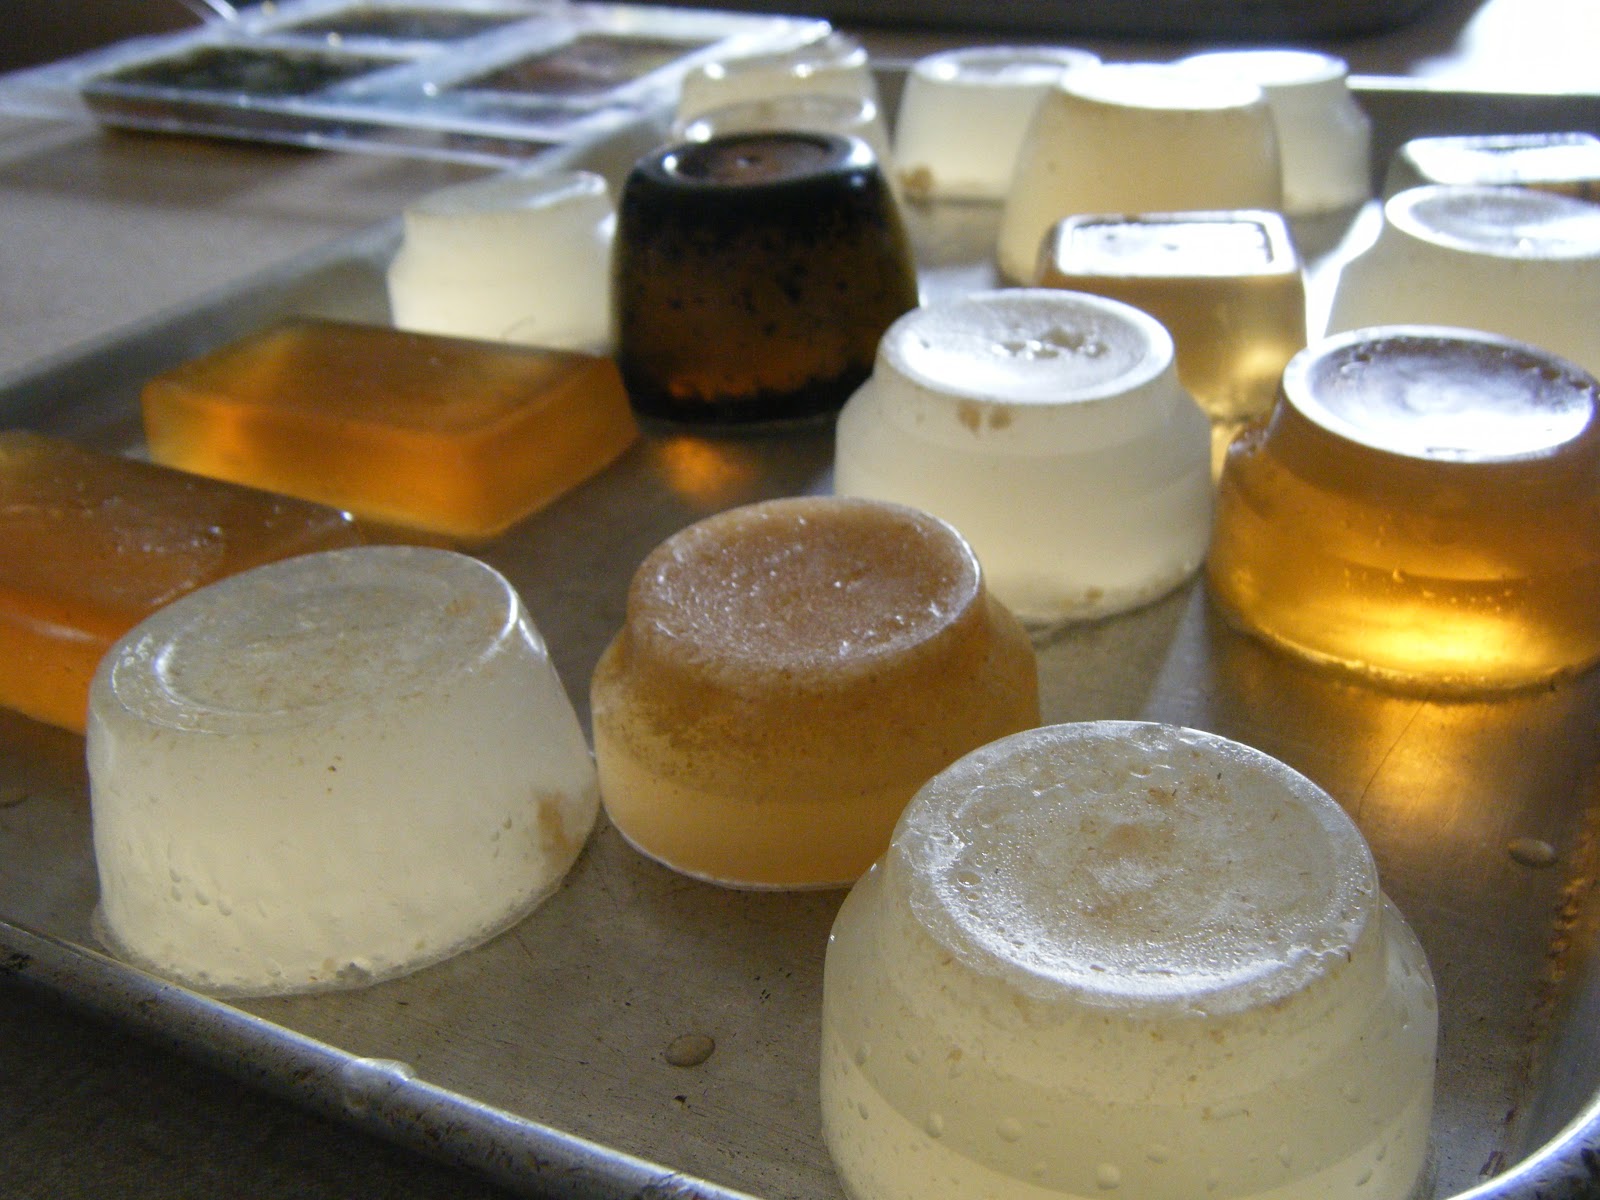
So here are some extra-nummy-goodness pictures of some of our finished soaps! Lavender ... Lemon-Sage ... Honey & Oats ... Brown Sugar & Honey ... Cedarwood & Honey ... Green Tea ... mmm!
Lavender, still in a mold.
(What I believe to be) Lemon-Sage still in molds.
Lavendar (foreground), Peppermint (left, dark bar), various others in background.
A couple of us do have a few commercial molds (foreground.)
Don't they all look so pretty?! Such variety of shapes, colors, smells!
Love, love, love!!! the fun shapes that come from single-serve fruit cups or applesauce! Yogurt, too!
Mmm .... so pretty!
I love to do this.
I love to share the knowledge.
I love when it's over because it's 4 hours on my feet!
LOL
... and many Christmas gifts, DONE!
* I do have a handout available, but it isn't "everything" you need to know. I mostly teach by doing. Hands on learning is the best way. BUT if you want a copy of the handout of handy tips and resources, leave a comment on this post or private message me at AECDesigns@gmail.com and I can email you a copy of the PDF. Use at your own risk because I'm sure I left out some details!
Soapmaking is ALWAYS epic!
It's that time of the year when a girl's thoughts turn to ... good clean fun! (Yeah, I made "that" joke. You should know better by now ... silly readers!)
So, I gathered some gals (and guys!) for another annual soapmaking event at the Community Crafts Studio. Well, almost annual. Last year it was just Suzanne and I in my kitchen at home. But still fun! This year we had a group of ten or so.
Check out our workspace, all prepped and ready for class ...
I like to focus on pantry soaps, using herbs, honey, oats, essential oils -- many of which are found in your pantry!
AND I like to encourage the use of "repurposed" soap molds. Any flexible plastic containers that end up in your recycling bin are great! They can usually be used a few times before cracking and then can still end up in the recycling bin! But sometimes I have to supplement with containers found at the Dollar Store. Hey, they're still recyclable and can be used even longer than the others.
Using a glycerin, melt-and-pour soap base is super easy! Especially with microwaves and glass measuring cups!
Please ignore my unhealthy (but oh so tasty) iced soft drink there in the background. What can I say? Vice! Thy name is Dr. Pepper!
The above pic is kind of odd looking, I know. But its what a partial 25 lb. block of soap looks like. (Oh, I order in 25 lb. blocks, baby! I like a LOT of good clean fun!)
I'm not going to run through all specifics and "how to"s here*. You can find that all over the web and in crafty books. But I can say this, I recommend high-quality soap bases and natural ingredients. No synthetic fragrances here! Essential oils and dried herbs, baby! Better for you!
So here are some extra-nummy-goodness pictures of some of our finished soaps! Lavender ... Lemon-Sage ... Honey & Oats ... Brown Sugar & Honey ... Cedarwood & Honey ... Green Tea ... mmm!
Lavender, still in a mold.
(What I believe to be) Lemon-Sage still in molds.
Lavendar (foreground), Peppermint (left, dark bar), various others in background.
A couple of us do have a few commercial molds (foreground.)
Don't they all look so pretty?! Such variety of shapes, colors, smells!
Love, love, love!!! the fun shapes that come from single-serve fruit cups or applesauce! Yogurt, too!
Mmm .... so pretty!
I love to do this.
I love to share the knowledge.
I love when it's over because it's 4 hours on my feet!
LOL
... and many Christmas gifts, DONE!
* I do have a handout available, but it isn't "everything" you need to know. I mostly teach by doing. Hands on learning is the best way. BUT if you want a copy of the handout of handy tips and resources, leave a comment on this post or private message me at AECDesigns@gmail.com and I can email you a copy of the PDF. Use at your own risk because I'm sure I left out some details!
Sunday, November 11, 2012
Crafting Custom Christmas Crayons
(Again, with the alliteration! I can't help myself!)
This weekend, I'm participating in an online "craft-a-long" with Trish over at Genuine Mudpie! She thought it would be fun to get together and "craft-a-long", however many of us are separated by some serious geography! Did I mention she's in Canada and I'm in the Midwest U.S. See?! Serious geography.
So ... everyone, let's "craft-a-long"!
Awhile back I found this blog post about (re)making crayons! I "pinned it" over on Pinterest thinking it would be a great Christmas project to make for any kiddos I know. The original steps can be found on the above link, but I will give you a few additional tips.
First off, grab a craft knife -- it's the fastest way to get all those paper labels off of 96 crayons. Seriously. Beats peeling them off with your fingernail. Just slice gently down the length of the wrapper, and they peel right off! I used Coke cans instead of tin cans because someone here (not me*) drinks a lot of Coke. We seldom use canned goods as we buy fresh produce and such. HOWEVER, the aluminium cans present a few ... erm ... issues. We'll discuss momentarily.
I sorted my crayons into like colors for mixing. Then broke them up and melted them in batches, from lights to dark. That way I could re-use cans! Sneaky, eh? So here are the light purples melting together.
Why do I have so many cans in the pot? Aluminium cans float in water. Like a lot. And then they tip over. In the water. Like a lot. The other cans are filler to keep them from tipping. And I could melt multiple batches at one time. Here's me pouring some melted crayons into a mold.
The beautiful thing about the aluminium cans? You can squeeze them to make a bit of a spout! Helpful! And yes, this is actually me pouring. Aluminium cools to the touch fairly quickly. I did have Chris' assistance plucking them from the hot water. I'm a bit delicate (i.e. whiny) and he has asbestos hands from working in the kitchen all day. He helped with this a lot more than I intended. He's nice like that. (I love it when he gets all crafty with me!)
Anyway, a bit of an aside ... did you know candy molds are CHEAP?! Like less than $2 each!!! I got a little crazy with the shapes. I have 3 - 4 more molds that you won't see today. BUT you will see soon. I need to make more crayons before Christmas. Didn't really get as many as I wanted from the box of 96 crayons.
There are leaves.
Snowflakes.
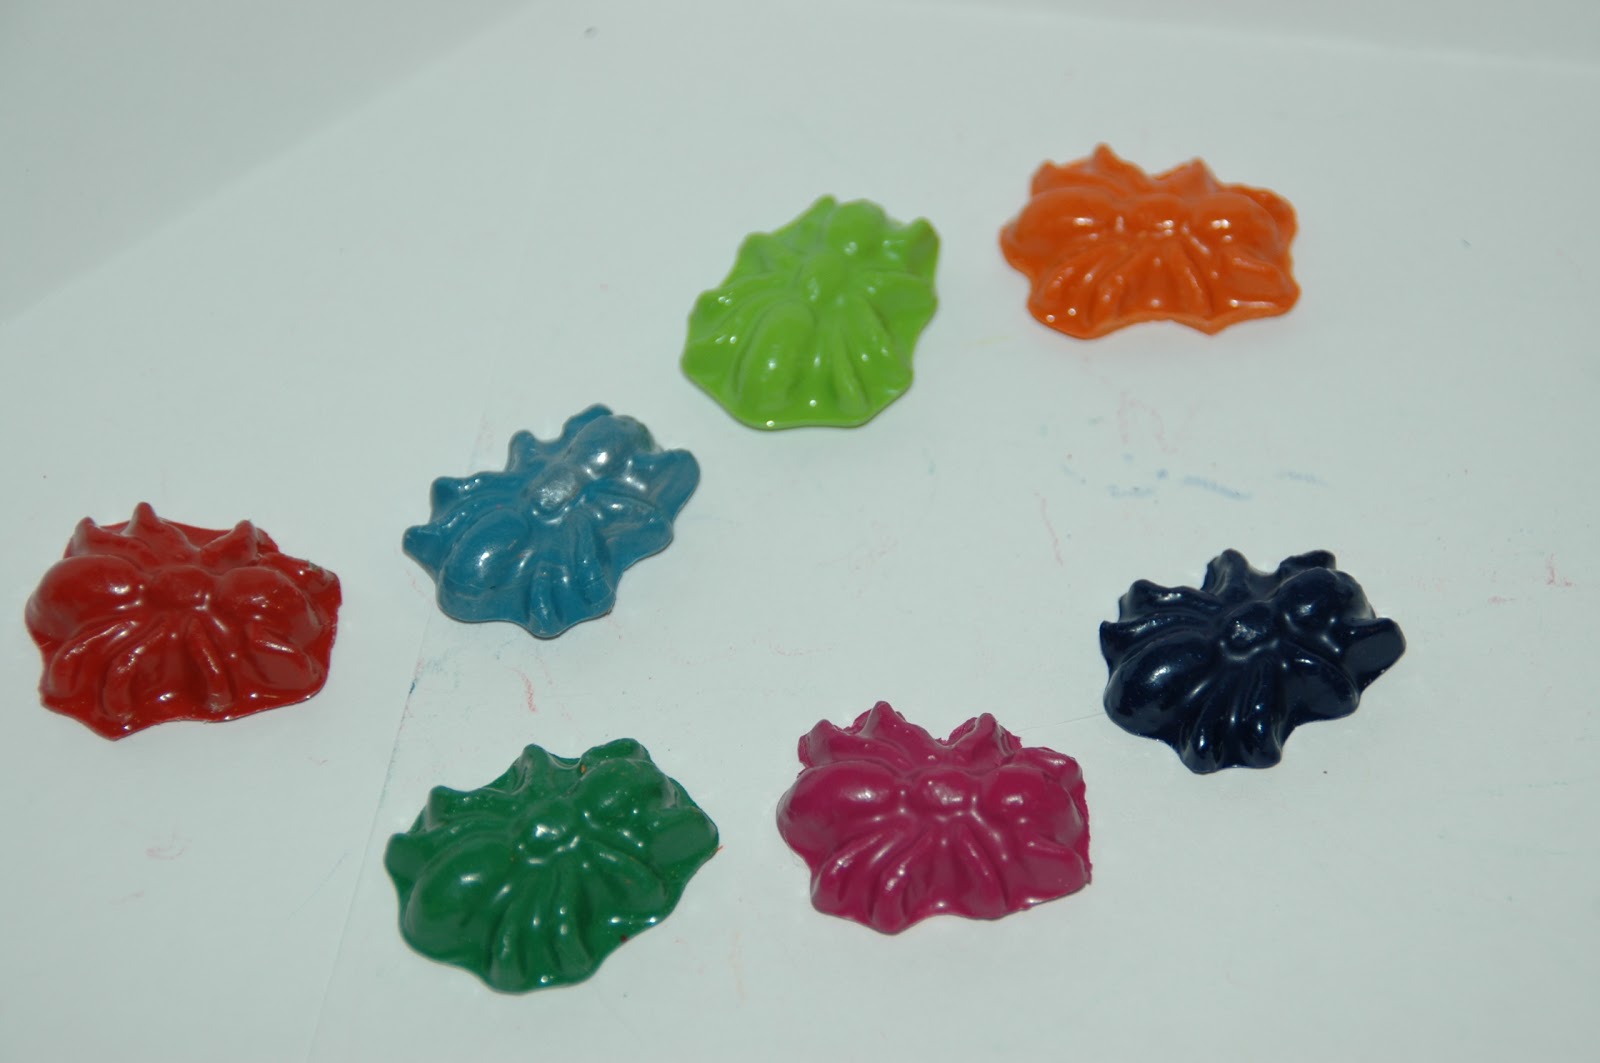
Spiders.
And toy soldiers!
I will also warn you that the crayons are much lighter when they're in liquid form than when they dry. Like quite a bit. So I'll be making more crayons. I need more anyway, but I want to shoot for some lighter colors to mix in with these. Some of them were darker than I intended.
Here are some additional shots of the crayons ... just for fun!
I really wish you could see the dark blues and purples. There were some metallic crayons mixed in the original box and they turned out really cool in the darker colors. They just didn't photograph real well.
But this was not a difficult project. Would make a great way to re-make all those broken crayons kids seem to accumulate. You know, the ones they don't want to use anymore because they're not "new" and don't look pretty anymore? Oh wait. Maybe that was just me ...
Anyway, thanks to Trish for bringing all of us together to share a craft ... even from miles and miles (and miles!) away.
* Oops! Forgot about my footnote ... I don't drink Coke. I'm a Dr. Pepper girl, just FYI.
This weekend, I'm participating in an online "craft-a-long" with Trish over at Genuine Mudpie! She thought it would be fun to get together and "craft-a-long", however many of us are separated by some serious geography! Did I mention she's in Canada and I'm in the Midwest U.S. See?! Serious geography.
So ... everyone, let's "craft-a-long"!
Awhile back I found this blog post about (re)making crayons! I "pinned it" over on Pinterest thinking it would be a great Christmas project to make for any kiddos I know. The original steps can be found on the above link, but I will give you a few additional tips.
First off, grab a craft knife -- it's the fastest way to get all those paper labels off of 96 crayons. Seriously. Beats peeling them off with your fingernail. Just slice gently down the length of the wrapper, and they peel right off! I used Coke cans instead of tin cans because someone here (not me*) drinks a lot of Coke. We seldom use canned goods as we buy fresh produce and such. HOWEVER, the aluminium cans present a few ... erm ... issues. We'll discuss momentarily.
I sorted my crayons into like colors for mixing. Then broke them up and melted them in batches, from lights to dark. That way I could re-use cans! Sneaky, eh? So here are the light purples melting together.
Why do I have so many cans in the pot? Aluminium cans float in water. Like a lot. And then they tip over. In the water. Like a lot. The other cans are filler to keep them from tipping. And I could melt multiple batches at one time. Here's me pouring some melted crayons into a mold.
The beautiful thing about the aluminium cans? You can squeeze them to make a bit of a spout! Helpful! And yes, this is actually me pouring. Aluminium cools to the touch fairly quickly. I did have Chris' assistance plucking them from the hot water. I'm a bit delicate (i.e. whiny) and he has asbestos hands from working in the kitchen all day. He helped with this a lot more than I intended. He's nice like that. (I love it when he gets all crafty with me!)
Anyway, a bit of an aside ... did you know candy molds are CHEAP?! Like less than $2 each!!! I got a little crazy with the shapes. I have 3 - 4 more molds that you won't see today. BUT you will see soon. I need to make more crayons before Christmas. Didn't really get as many as I wanted from the box of 96 crayons.
There are leaves.
Snowflakes.
Spiders.
And toy soldiers!
I will also warn you that the crayons are much lighter when they're in liquid form than when they dry. Like quite a bit. So I'll be making more crayons. I need more anyway, but I want to shoot for some lighter colors to mix in with these. Some of them were darker than I intended.
Here are some additional shots of the crayons ... just for fun!
I really wish you could see the dark blues and purples. There were some metallic crayons mixed in the original box and they turned out really cool in the darker colors. They just didn't photograph real well.
But this was not a difficult project. Would make a great way to re-make all those broken crayons kids seem to accumulate. You know, the ones they don't want to use anymore because they're not "new" and don't look pretty anymore? Oh wait. Maybe that was just me ...
Anyway, thanks to Trish for bringing all of us together to share a craft ... even from miles and miles (and miles!) away.
* Oops! Forgot about my footnote ... I don't drink Coke. I'm a Dr. Pepper girl, just FYI.
Sunday, November 4, 2012
Technicolor Dreamin'
What do you do when your little buddy Mr. Ian asks you what could be used to make a technicolor dreamcoat for Halloween?
Well, you offer to make it for him!
Oh, and of course you line it in gold lame.
Why, because it's supposed to be lined in gold. Duh!
Am I a good Auntie-not-a-real-Auntie, or what?!
Well, you offer to make it for him!
Oh, and of course you line it in gold lame.
Why, because it's supposed to be lined in gold. Duh!
Am I a good Auntie-not-a-real-Auntie, or what?!
Subscribe to:
Posts (Atom)