(Okay, if anyone gets the reference, I'd love to see a comment!)
I've got WIPs coming out my ears! *
I've been neglecting the Sew-A-Long. Some of the past few weeks of projects weren't really my "thang" so I've skipped a few things. This week's one looked fun, but I just didn't have the energy or the interest to do it.
BUT I've got projects "on the needles" (knitting, for those who don't know), "on the hook" (crocheting) and a couple sewing things kinda hanging out in my head and on my table.
Here's a current crochet project I'm excited about!
It's the Sardinia Sweater from Rowan's Summer Crochet booklet. I fell in love with almost every pattern in this booklet! I decided to start with this one. I ordered the yarn from Knitorious. You know, the place I spend a bit of my time ... fondling--er, I mean SELLING yarn. It's Rowan's Cotton Glace in Winsor. Ain't it pretty?!?!
I've also finished a little DIY sample for an upcoming thing at the Community Crafts Studio. Check THIS out:
A little notebook made from repurposed cardboard with a touch of scrapbooking paper, yarn, a button ... fun and easy!
So, you can see I've been doing stuff. Honest!
* For those who don't know ... WIPs are Works In Progress.
Showing posts with label Zakka Style Sew-A-Long. Show all posts
Sunday, July 22, 2012
Sunday, July 1, 2012
Zakka Style Sew-A-Long: Week 13
PATCHWORK POT HOLDER
I skipped the project for week 13 because I don't really need pocket hand warmers. Besides, usually when I'm in need of something to keep my hands warm, I'm not near a microwave. (The hand warmers require you to heat them in a microwave.)
Anyway, I DO need week 13's pot holders! Who doesn't need pot holders, right? (Granted, I'm only showing you one of them. I haven't bound the second one yet, but I will.) The project calls for nice, even strips of fabric.
I can never follow the rules.
I love making wonky strips. I think it's more fun! I pulled together some various fabrics that all had the same colors, some of my favs. I used Osnaburg for some of the solids and for the binding. I made the pockets on the back in the same. I didn't photograph that because it's not very exciting. But it turned out well! Trust me!
I quilted the lines to follow some of the seams. And then did a few repeats inside some of those lines.
Seen to the far right of the potholder is one of my tea towels. Ooo...pretty, huh? I think I'm going to use some of the wonky scraps to edge another tea towel or two made of Osnaburg.
The blue magnet/bottle opener is from Bard's Beer. They make a pretty tasty gluten free beer that Chris likes. I like it, too. It's pretty darn good! He won a contest and they sent him that bottle opener and a Bard's tee shirt. And here he is wearing it!
Maybe we should've ironed it first ...
Oh well!
I skipped the project for week 13 because I don't really need pocket hand warmers. Besides, usually when I'm in need of something to keep my hands warm, I'm not near a microwave. (The hand warmers require you to heat them in a microwave.)
Anyway, I DO need week 13's pot holders! Who doesn't need pot holders, right? (Granted, I'm only showing you one of them. I haven't bound the second one yet, but I will.) The project calls for nice, even strips of fabric.
I can never follow the rules.
I love making wonky strips. I think it's more fun! I pulled together some various fabrics that all had the same colors, some of my favs. I used Osnaburg for some of the solids and for the binding. I made the pockets on the back in the same. I didn't photograph that because it's not very exciting. But it turned out well! Trust me!
I quilted the lines to follow some of the seams. And then did a few repeats inside some of those lines.
Seen to the far right of the potholder is one of my tea towels. Ooo...pretty, huh? I think I'm going to use some of the wonky scraps to edge another tea towel or two made of Osnaburg.
The blue magnet/bottle opener is from Bard's Beer. They make a pretty tasty gluten free beer that Chris likes. I like it, too. It's pretty darn good! He won a contest and they sent him that bottle opener and a Bard's tee shirt. And here he is wearing it!
Maybe we should've ironed it first ...
Oh well!
Sunday, June 17, 2012
Zakka Style Sew-A-Long: Week 11
ORCHARD PATH TWEED POUCH
This week's project was a pretty quick stitch. Even with all the hand-sewing. Yes, you heard that right - hand-sewing. I did it. And ... and ... I even LIKED it.
The little hexagons were kinda fun. I wish I had used the invisible thread to join the hexagons together. It really does disappear. I chose to hand-stitch the appliqués to the panel instead of machine stitch (using the invisible thread.) I think it looks better and I like how it turned out.
The project called for some interfacing on the lining fabric, but I didn't really feel it needed it. My wool exterior is fairly stiff and I don't really like the firm feeling on the lining. So I just left the interfacing out. I also didn't use another print for the lining and I limited it to two different prints for the hexagons. I just didn't want that much going on since the wool is pretty heavily textured itself. I wasn't sure I'd like the little corner patches, but I kinda like 'em on this bag.
Since my zipper was a little short (7" instead of the listed 9") I added fabric tabs before inserting.
This week's project was a pretty quick stitch. Even with all the hand-sewing. Yes, you heard that right - hand-sewing. I did it. And ... and ... I even LIKED it.
The little hexagons were kinda fun. I wish I had used the invisible thread to join the hexagons together. It really does disappear. I chose to hand-stitch the appliqués to the panel instead of machine stitch (using the invisible thread.) I think it looks better and I like how it turned out.
The project called for some interfacing on the lining fabric, but I didn't really feel it needed it. My wool exterior is fairly stiff and I don't really like the firm feeling on the lining. So I just left the interfacing out. I also didn't use another print for the lining and I limited it to two different prints for the hexagons. I just didn't want that much going on since the wool is pretty heavily textured itself. I wasn't sure I'd like the little corner patches, but I kinda like 'em on this bag.
Since my zipper was a little short (7" instead of the listed 9") I added fabric tabs before inserting.
Sunday, June 10, 2012
Zakka Style Sew-A-Long: Week 10
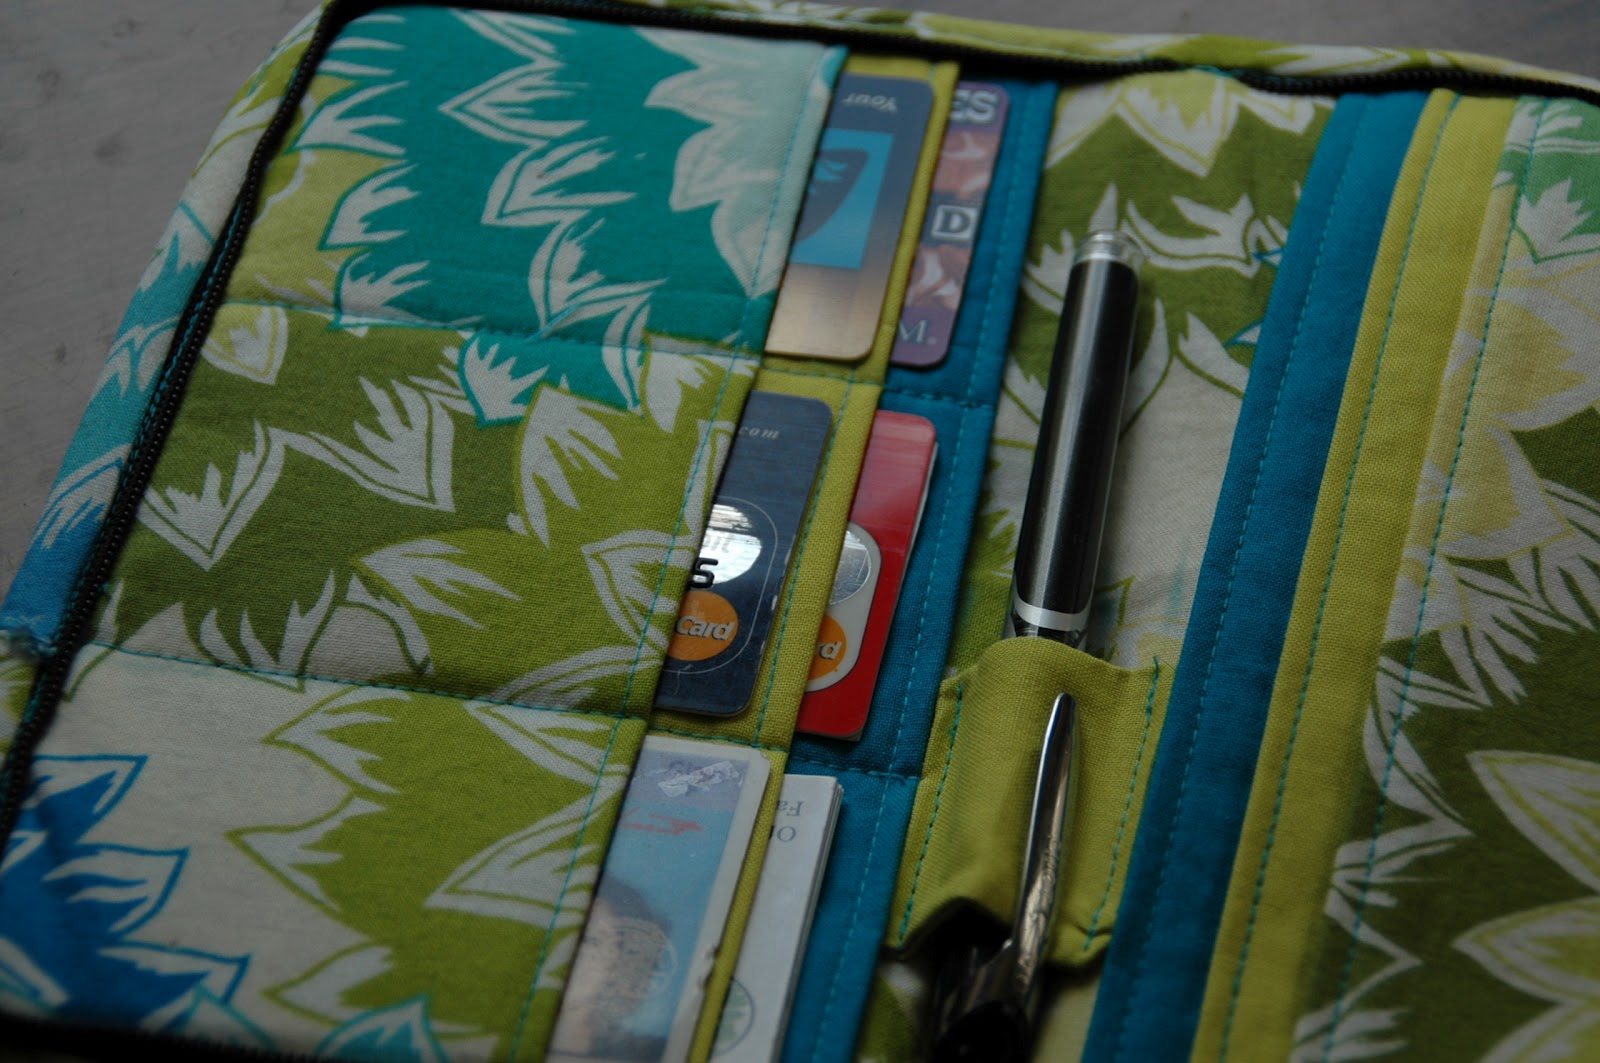
ZIP ORGANIZER
Well ... parts of this project were fun.
Breaking two needles in a row.
Unpicking stitches gone astray due to the thickness of the layers.
Those, not so much fun.
I probably shouldn't have used denim for the exterior.
Too heavy.
Shouldn't have used fusible fleece for the exterior interfacing.
Too poofy.
IF (and that's a big IF) I make this again, I will use something lighter-weight for the exterior with a firm, but thinner interfacing. I just really wanted to make this wallet/organizer to match my Big-Ass Denim Bag.
Sigh.
It's okay. I like it well enough.
I found that installing the zipper was a heck of a lot easier without pinning in place. Pinning something this thick was a nightmare. Everything wanted to shift because it was so thick. I just had to go slow and line everything up as I went. I'd clip and place the corners as I got to them. Yes, I had to stop and start a few times, but I found it easier this way.
I did take the advice of one of the other bloggers and stitch the back zip pocket closed so items wouldn't shift around to the wrong end. I didn't get a good picture of it. Sorry. But this is why I "quilted" the exterior to hide the stitch line.
Please pay no attention to the wonky binding. This thing was too thick for the listed width of binding. Nightmare. Ugh.
It's fine.
It's functional.
Well ... parts of this project were fun.
Breaking two needles in a row.
Unpicking stitches gone astray due to the thickness of the layers.
Those, not so much fun.
I probably shouldn't have used denim for the exterior.
Too heavy.
Shouldn't have used fusible fleece for the exterior interfacing.
Too poofy.
IF (and that's a big IF) I make this again, I will use something lighter-weight for the exterior with a firm, but thinner interfacing. I just really wanted to make this wallet/organizer to match my Big-Ass Denim Bag.
Sigh.
It's okay. I like it well enough.
I found that installing the zipper was a heck of a lot easier without pinning in place. Pinning something this thick was a nightmare. Everything wanted to shift because it was so thick. I just had to go slow and line everything up as I went. I'd clip and place the corners as I got to them. Yes, I had to stop and start a few times, but I found it easier this way.
I did take the advice of one of the other bloggers and stitch the back zip pocket closed so items wouldn't shift around to the wrong end. I didn't get a good picture of it. Sorry. But this is why I "quilted" the exterior to hide the stitch line.
Please pay no attention to the wonky binding. This thing was too thick for the listed width of binding. Nightmare. Ugh.
It's fine.
It's functional.
Sunday, June 3, 2012
Zakka Style Sew-A-Long: Week 9
STEM MESSENGER BAG
Yeah, yeah, yeah ... I missed two weeks of projects.
I know. Time and traveling just didn't allow it to happen.
Kinda bummed, too. Week 8 was a quilt that I was DYING to make.
I still will. Just not right now.
BUT I did have time (barely) to do the project for Week 9 - The Stem Messenger Bag. However, messenger bags aren't really "me." The flap gets in my way or I'm always flipping it the wrong way or I can never get the snap to line up. Messenger bags just don't work for me. I loved the petals though. So I revamped and came up with something that works for me.

The project also called for machine-stitched appliqué that I really don't think will hold up well to all the wear and tear a bag or purse gets. Something always rubbing against the edges. PLUS I've been wanting to try a seamed edge, reverse appliqué technique that I saw in Modern Patchwork magazine. I'm pretty pleased with my first attempt at this. The linen stretches, so it may not have been ideal for this project. The edges of the shapes are a little wonky, but not terrible.

As you can see, I did add a "flap" ... it's just to keep the bag closed. Uses a magnetic snap on the inside to attach to. Ever since I added metal hardware to this bag, I've been wanting to use more. So I used the metal rings to attach the strap tabs to the bag, then I could add the actual strap after. This is much, much easier when turning the bag right-side out as the whole strap isn't in the way.
Instead of adding gussets to "box" the bottom of the bag, I added an entire panel. This actually ended up being much easier than I thought it would be! Did it to the lining, too. Since the front panel was fairly small, I knew that adding a gusset would mean the front panel would end up wrapping around the bottom and sides, so I added the panel for depth.
Yeah, yeah, yeah ... I missed two weeks of projects.
I know. Time and traveling just didn't allow it to happen.
Kinda bummed, too. Week 8 was a quilt that I was DYING to make.
I still will. Just not right now.
BUT I did have time (barely) to do the project for Week 9 - The Stem Messenger Bag. However, messenger bags aren't really "me." The flap gets in my way or I'm always flipping it the wrong way or I can never get the snap to line up. Messenger bags just don't work for me. I loved the petals though. So I revamped and came up with something that works for me.
The project also called for machine-stitched appliqué that I really don't think will hold up well to all the wear and tear a bag or purse gets. Something always rubbing against the edges. PLUS I've been wanting to try a seamed edge, reverse appliqué technique that I saw in Modern Patchwork magazine. I'm pretty pleased with my first attempt at this. The linen stretches, so it may not have been ideal for this project. The edges of the shapes are a little wonky, but not terrible.
As you can see, I did add a "flap" ... it's just to keep the bag closed. Uses a magnetic snap on the inside to attach to. Ever since I added metal hardware to this bag, I've been wanting to use more. So I used the metal rings to attach the strap tabs to the bag, then I could add the actual strap after. This is much, much easier when turning the bag right-side out as the whole strap isn't in the way.
Instead of adding gussets to "box" the bottom of the bag, I added an entire panel. This actually ended up being much easier than I thought it would be! Did it to the lining, too. Since the front panel was fairly small, I knew that adding a gusset would mean the front panel would end up wrapping around the bottom and sides, so I added the panel for depth.
Monday, May 28, 2012
Busy As a Bee
I've missed the last two Zakka Style Sew-A-Long projects as I've had a lot going on ... traveling ... other craftiness that needed completing. If you don't believe me, here's the proof!
Here's a little something I whipped up for my BFF:
I've been wanting to combine some crochet and sewing and this is the first outcome of that desire! The center panel is just straight Tunisian crochet. Love the purples, pinks, browns all together. The self-striping yarn does most of the work. I found a nice deep fuchsia cotton to make the rest of the pillow cover. Made the custom insert myself even using muslin and poly-fill. You can't see it, but I even printed a care tag for the inside. Ooo ... fancy! And don't forget the inset zipper! The insert I overfilled a little bit so that as it settles and compresses a bit, the pillow won't sag.
And then there is this little denim wristlet purse for a new PhD I know:
I trimmed the outside with the same fabric I used for the lining. Tres chic!
There are two other projects that got completed the past two weeks. I will be posting about them at a later date. AND I've been working feverishly on a cute capelet for an upcoming workshop I'll be co-teaching my local LYS next month! Yea!!!!
Edit: Wristlet design based upon a pattern/how-to from Sew What! Bags by Lexie Barnes. I inserted the zipper differently using fabric tabs to cover the ends of the zipper.
Here's a little something I whipped up for my BFF:
I've been wanting to combine some crochet and sewing and this is the first outcome of that desire! The center panel is just straight Tunisian crochet. Love the purples, pinks, browns all together. The self-striping yarn does most of the work. I found a nice deep fuchsia cotton to make the rest of the pillow cover. Made the custom insert myself even using muslin and poly-fill. You can't see it, but I even printed a care tag for the inside. Ooo ... fancy! And don't forget the inset zipper! The insert I overfilled a little bit so that as it settles and compresses a bit, the pillow won't sag.
And then there is this little denim wristlet purse for a new PhD I know:
I trimmed the outside with the same fabric I used for the lining. Tres chic!
There are two other projects that got completed the past two weeks. I will be posting about them at a later date. AND I've been working feverishly on a cute capelet for an upcoming workshop I'll be co-teaching my local LYS next month! Yea!!!!
Edit: Wristlet design based upon a pattern/how-to from Sew What! Bags by Lexie Barnes. I inserted the zipper differently using fabric tabs to cover the ends of the zipper.
Sunday, May 13, 2012
Zakka Style Sew-A-Long: Week 6
ITTY BITTY QUILT BLOCK MAGNETS
Or not. Busy, busy week this was. I wasn't even going to attempt to do this week's project. Not just because I didn't have time, I also have a stainless front refrigerator. Magnets don't stick.
BUT ...
(There's always a but.)
On Saturday it occurred to me what a great idea this project was for using up scraps. Which I have begun shoving in a plastic bag. For now. Working on a better system, but that's not really the point. I have all these scrap fabric to use! But I still don't need magnets. So I decided to make broaches! Well, broach singular. (Hey! I didn't have a lot of time, okay?! Get off my back!)
Anyway, it isn't perfect. I consider it my trial run as I see more of these in my future!
Now, for the specifics. I fussy-cut a piece of home dec weight cotton, used some repurposed denim scraps to surround it and attached a layer of fusible fleece behind it. THEN I used some No. 5 Perle Cotton thread to put a simple running stitch around the flower. (There I go, hand-sewing again!) The back is Osnaburg and I used more of that to create a stronger base for the pin finding inside the whole thing. Just like a scrap folded about 4 times to make it thicker. Worked pretty well. Stitched the pin to the backing BEFORE sewing the front and back together, RS facing then turning RS out. Please ignore the wonky edge there on the back. I was doing this quick and the seamed backing pulled apart a little. Then I top-stitched all around the border twice. Yes, I intentionally made those lines wonky as the edges aren't perfectly square. Then denim stretches a little bit.
So that's my "Not-a-Magnet" for this week's project!
Or not. Busy, busy week this was. I wasn't even going to attempt to do this week's project. Not just because I didn't have time, I also have a stainless front refrigerator. Magnets don't stick.
BUT ...
(There's always a but.)
On Saturday it occurred to me what a great idea this project was for using up scraps. Which I have begun shoving in a plastic bag. For now. Working on a better system, but that's not really the point. I have all these scrap fabric to use! But I still don't need magnets. So I decided to make broaches! Well, broach singular. (Hey! I didn't have a lot of time, okay?! Get off my back!)
Anyway, it isn't perfect. I consider it my trial run as I see more of these in my future!
Now, for the specifics. I fussy-cut a piece of home dec weight cotton, used some repurposed denim scraps to surround it and attached a layer of fusible fleece behind it. THEN I used some No. 5 Perle Cotton thread to put a simple running stitch around the flower. (There I go, hand-sewing again!) The back is Osnaburg and I used more of that to create a stronger base for the pin finding inside the whole thing. Just like a scrap folded about 4 times to make it thicker. Worked pretty well. Stitched the pin to the backing BEFORE sewing the front and back together, RS facing then turning RS out. Please ignore the wonky edge there on the back. I was doing this quick and the seamed backing pulled apart a little. Then I top-stitched all around the border twice. Yes, I intentionally made those lines wonky as the edges aren't perfectly square. Then denim stretches a little bit.
So that's my "Not-a-Magnet" for this week's project!
Saturday, May 5, 2012
Zakka Style Sew-A-Long: Week 5
PATCHWORK PENCIL CASE
The project for this week was cute and looked relatively easy. Thought I'd have some fun with the patchwork portion. Which I did.
BUT that being said ...
It's gripe time.
I think the construction for this was W-A-Y more convoluted and confusing than it needed to be. I think there are better ways to do something so simple. And to suggest leaving only a 1.25" opening to turn it right-side-out through?? When there is interfacing involved?? And a strap?? Yeah, that's not really big enough and I have tiny fingers! The material is just to thick. The linen got stretched out at the opening so it's uneven after closing and stitching it up. Oh, and "use a knitting needle ..." to help push the fabric through??? Even with a fairly tight-weave linen, the knitting needle will punch right through the weave. Three times. I knew better than to use it, but I did anyway. So, that's on me. Now I have three holes in it. Lovely.
If I do this project again, I will do it differently.
And write up my own instructions.
And post them here.
Because this was a pain in the ass.
In my humble opinion.
But it's kick-ass in RED!
** I will admit that I had some unrelated frustrations arise as I was writing this post so if my rant seems a little blunt, I apologize. But my points I defend. This could have had simpler and better instructions.
The project for this week was cute and looked relatively easy. Thought I'd have some fun with the patchwork portion. Which I did.
BUT that being said ...
It's gripe time.
I think the construction for this was W-A-Y more convoluted and confusing than it needed to be. I think there are better ways to do something so simple. And to suggest leaving only a 1.25" opening to turn it right-side-out through?? When there is interfacing involved?? And a strap?? Yeah, that's not really big enough and I have tiny fingers! The material is just to thick. The linen got stretched out at the opening so it's uneven after closing and stitching it up. Oh, and "use a knitting needle ..." to help push the fabric through??? Even with a fairly tight-weave linen, the knitting needle will punch right through the weave. Three times. I knew better than to use it, but I did anyway. So, that's on me. Now I have three holes in it. Lovely.
If I do this project again, I will do it differently.
And write up my own instructions.
And post them here.
Because this was a pain in the ass.
In my humble opinion.
But it's kick-ass in RED!
** I will admit that I had some unrelated frustrations arise as I was writing this post so if my rant seems a little blunt, I apologize. But my points I defend. This could have had simpler and better instructions.
Sunday, April 29, 2012
Zakka Style Sew-A-Long: Week 4
SEWING KIT
Well, despite being sick most of the week with some lovely respiratory bug, I managed to finish my sewing kit! I actually planned to make two - one as a gifty for someone - but that totally wasn't going to happen!
My sewing kit came out a little smaller than it was supposed to. Apparently trying to cut fabric with a fever means that you misjudge the size of the inner pockets. Oh, well ... c'est la vie! I was a good girl and actually hand-stitched my pincushion closed. Fancy that!
I added some top-stitching because I like it. Plus, the Osnaburg fabric is a little soft and doesn't hold a shape super great and the extra stitching gives it some "oomph!" I did manage to score some linen the other week to use for future projects in the Sew-A-Long, but I was lazy and didn't feel like getting it out.
Now, I just need to find some tiny scissors for my sewing kit!
Well, despite being sick most of the week with some lovely respiratory bug, I managed to finish my sewing kit! I actually planned to make two - one as a gifty for someone - but that totally wasn't going to happen!
My sewing kit came out a little smaller than it was supposed to. Apparently trying to cut fabric with a fever means that you misjudge the size of the inner pockets. Oh, well ... c'est la vie! I was a good girl and actually hand-stitched my pincushion closed. Fancy that!
I added some top-stitching because I like it. Plus, the Osnaburg fabric is a little soft and doesn't hold a shape super great and the extra stitching gives it some "oomph!" I did manage to score some linen the other week to use for future projects in the Sew-A-Long, but I was lazy and didn't feel like getting it out.
Now, I just need to find some tiny scissors for my sewing kit!
Saturday, April 21, 2012
Zakka Style Sew-A-Long: Week 3
ZAKKA PINCUSHION
I'm lazy. I'll admit it.
I seldom do any hand sewing.
This project only called for a wee tiny bit.
I still didn't do it.
But it's a cute little pincushion.
Of course, mine is a naughty girl.
She boldly proclaims "Stick It In Me".

She's a bad girl.
------------------------------------------
This project was kinda fun actually!
I played around with fabric stamping. I was going to design my own stamp using an eraser, but there's a whole saga as to why that didn't happen. You don't care. I won't bore you. BUT I did buy some simple block-letter stamps. I found this wicked cool fabric-paint-that-works-like-a-fabric-dye that was pretty easy to use. You have to let it dry for 24 hours then heat set it with an iron. I can assure you thatbeing lazy and waiting 3 or 4 days poses no issue. Ahem.
And I like the little dome button on the front. Reminds me of a gumdrop. And yes, I understand the irony of NOT wanting to hand sew the cushion closed after stuffing but hand sewing on the button. Yes, yes ... I'm quite the paradox.
Or just lazy.
Whatever.
I'm lazy. I'll admit it.
I seldom do any hand sewing.
This project only called for a wee tiny bit.
I still didn't do it.
But it's a cute little pincushion.
Of course, mine is a naughty girl.
She boldly proclaims "Stick It In Me".
She's a bad girl.
------------------------------------------
This project was kinda fun actually!
I played around with fabric stamping. I was going to design my own stamp using an eraser, but there's a whole saga as to why that didn't happen. You don't care. I won't bore you. BUT I did buy some simple block-letter stamps. I found this wicked cool fabric-paint-that-works-like-a-fabric-dye that was pretty easy to use. You have to let it dry for 24 hours then heat set it with an iron. I can assure you that
And I like the little dome button on the front. Reminds me of a gumdrop. And yes, I understand the irony of NOT wanting to hand sew the cushion closed after stuffing but hand sewing on the button. Yes, yes ... I'm quite the paradox.
Or just lazy.
Whatever.
Saturday, April 14, 2012
Zakka Style Sew-A-Long: Week 2
HOUSE POUCH
This week's project in the Sew-A-Long was an adorable little pouch, shaped like a house, complete with doors and windows and a flowery garden.
In other words: a little too cutesy for me.
Don't get me wrong, there were a lot of great projects by other folk in the Sew-A-Long. Great color and texture choices. Some nice embroidered details. It's just not my bag, baby! (Points to those who get the Austin Powers reference.)
So, I debated what to do. Do I make it anyway, even though I don't know what the hell I'll do with it? Do I skip this week's project and get a jump on one of the bigger ones coming up?
I decided that I would make the House Pouch.
But I'd make it MY way.

I decided to do a simple row of houses with varying roof lines, heights, widths. The houses are coordinating quilting cottons on an osnaburg background. I left the backside plain.
The bag is lined in black cotton. I added coordinating tabs to the zipper ends for a more finished look.
This week's project in the Sew-A-Long was an adorable little pouch, shaped like a house, complete with doors and windows and a flowery garden.
In other words: a little too cutesy for me.
Don't get me wrong, there were a lot of great projects by other folk in the Sew-A-Long. Great color and texture choices. Some nice embroidered details. It's just not my bag, baby! (Points to those who get the Austin Powers reference.)
So, I debated what to do. Do I make it anyway, even though I don't know what the hell I'll do with it? Do I skip this week's project and get a jump on one of the bigger ones coming up?
I decided that I would make the House Pouch.
But I'd make it MY way.
I decided to do a simple row of houses with varying roof lines, heights, widths. The houses are coordinating quilting cottons on an osnaburg background. I left the backside plain.
The bag is lined in black cotton. I added coordinating tabs to the zipper ends for a more finished look.
Here's a close up of the zipper end.
I kept it simple, modern and j-u-s-t right.
For me.
I think it will hold all of my crochet hooks nicely.
Saturday, April 7, 2012
Zakka Style Sew-A-Long: Week 1
ZIGZAG TOTE
Well, here's my first project in the Sew-A-Long!
It was kinda fun to do! Hadn't really done much quilt piecing before except for a few wonky blocks where precision isn't really a priority. But this time, I had to take more care. It still isn't perfect, but I'm pleased with it.
Since my zigzag strips weren't 100% precise, I decided that the quilting lines shouldn't be either! So I overlapped some of the lines ... made some longer ... some shorter. I just got crazy with it!
And on the back, too!
Ooo...check out the inside!
(Is that a big pocket or are you just happy to see me?!?!)
AND my first magnetic snap closure.
Really easy to insert. I see more of these in my future.
By happy accident, I ended up with the "lining" side of the straps facing out. I like the bright chartreuse on the outside. I also wasn't going to interface the straps since I seldom feel the need, but since the body of the bag is so structured due to the quilting, I decided that "floppy" straps probably weren't the best choice. Yeah, it added extra steps and time, but I think they look better with some body to them rather than just hanging limply.
So, that's week one of the Sew-A-Long! Time to go upload the pics to my new Flickr account! (Watch for a link on the sidebar ... I'll get around to adding it soon. I swear!)
Well, here's my first project in the Sew-A-Long!
It was kinda fun to do! Hadn't really done much quilt piecing before except for a few wonky blocks where precision isn't really a priority. But this time, I had to take more care. It still isn't perfect, but I'm pleased with it.
Since my zigzag strips weren't 100% precise, I decided that the quilting lines shouldn't be either! So I overlapped some of the lines ... made some longer ... some shorter. I just got crazy with it!
And on the back, too!
Ooo...check out the inside!
(Is that a big pocket or are you just happy to see me?!?!)
AND my first magnetic snap closure.
Really easy to insert. I see more of these in my future.
By happy accident, I ended up with the "lining" side of the straps facing out. I like the bright chartreuse on the outside. I also wasn't going to interface the straps since I seldom feel the need, but since the body of the bag is so structured due to the quilting, I decided that "floppy" straps probably weren't the best choice. Yeah, it added extra steps and time, but I think they look better with some body to them rather than just hanging limply.
So, that's week one of the Sew-A-Long! Time to go upload the pics to my new Flickr account! (Watch for a link on the sidebar ... I'll get around to adding it soon. I swear!)
Monday, April 2, 2012
What Have I Gotten Myself Into??
That's sorta what I thought - briefly!! - when I decided to partake in something challenging. Something a little outside my comfort zone. Something that I'm sure will make me say "What have I gotten myself into?!?" more than once.
BUT I'm doing it.
While checking out another blog, I discovered that there was going to be a Sew-A-Long based on a book I recently purchased called Zakka Style by Rashida Colman-Hale. They're going to work through all the projects in the book - one per week. That's right 22 weeks of sewing!!
And some crazy part of me said "Hey! This might be fun!" I like a lot of the projects - hence, the reason I bought the book in the first place - and I thought it would be a good way to build up a stash of gifts to keep handy. You know, if I don't keep them for myself! Plus, I'll probably pick up a new technique or two (or twelve) along the way. And since I'll be posting my finished projects along the way, there's some feeling of accountability (i.e. I have to finish this or else THEY will know I didn't!!!)
While still waffling about if I should do this Sew-A-Long, I learned that ...
THERE. WILL. BE. GIVE. A. WAYS.
I sew and you might give me free sh*t?!?!
I'm in.
Here's my book and my pincushion, ready to get started!

To keep up with my progress, come back. OFTEN!
I'll give you further details on my new Flickr account and everything else I'll need to Sew-A-Long! I've even added a new button to my Blog! Check it out ...
BUT I'm doing it.
While checking out another blog, I discovered that there was going to be a Sew-A-Long based on a book I recently purchased called Zakka Style by Rashida Colman-Hale. They're going to work through all the projects in the book - one per week. That's right 22 weeks of sewing!!
And some crazy part of me said "Hey! This might be fun!" I like a lot of the projects - hence, the reason I bought the book in the first place - and I thought it would be a good way to build up a stash of gifts to keep handy. You know, if I don't keep them for myself! Plus, I'll probably pick up a new technique or two (or twelve) along the way. And since I'll be posting my finished projects along the way, there's some feeling of accountability (i.e. I have to finish this or else THEY will know I didn't!!!)
While still waffling about if I should do this Sew-A-Long, I learned that ...
THERE. WILL. BE. GIVE. A. WAYS.
I sew and you might give me free sh*t?!?!
I'm in.
Here's my book and my pincushion, ready to get started!
To keep up with my progress, come back. OFTEN!
I'll give you further details on my new Flickr account and everything else I'll need to Sew-A-Long! I've even added a new button to my Blog! Check it out ...
Subscribe to:
Posts (Atom)