Wednesday, June 27, 2012

Summer Shower Snails

WTF, you ask?!?

It's summer.
There was a baby shower.
The fabric is covered in cute snails.

WTF did you think I meant?


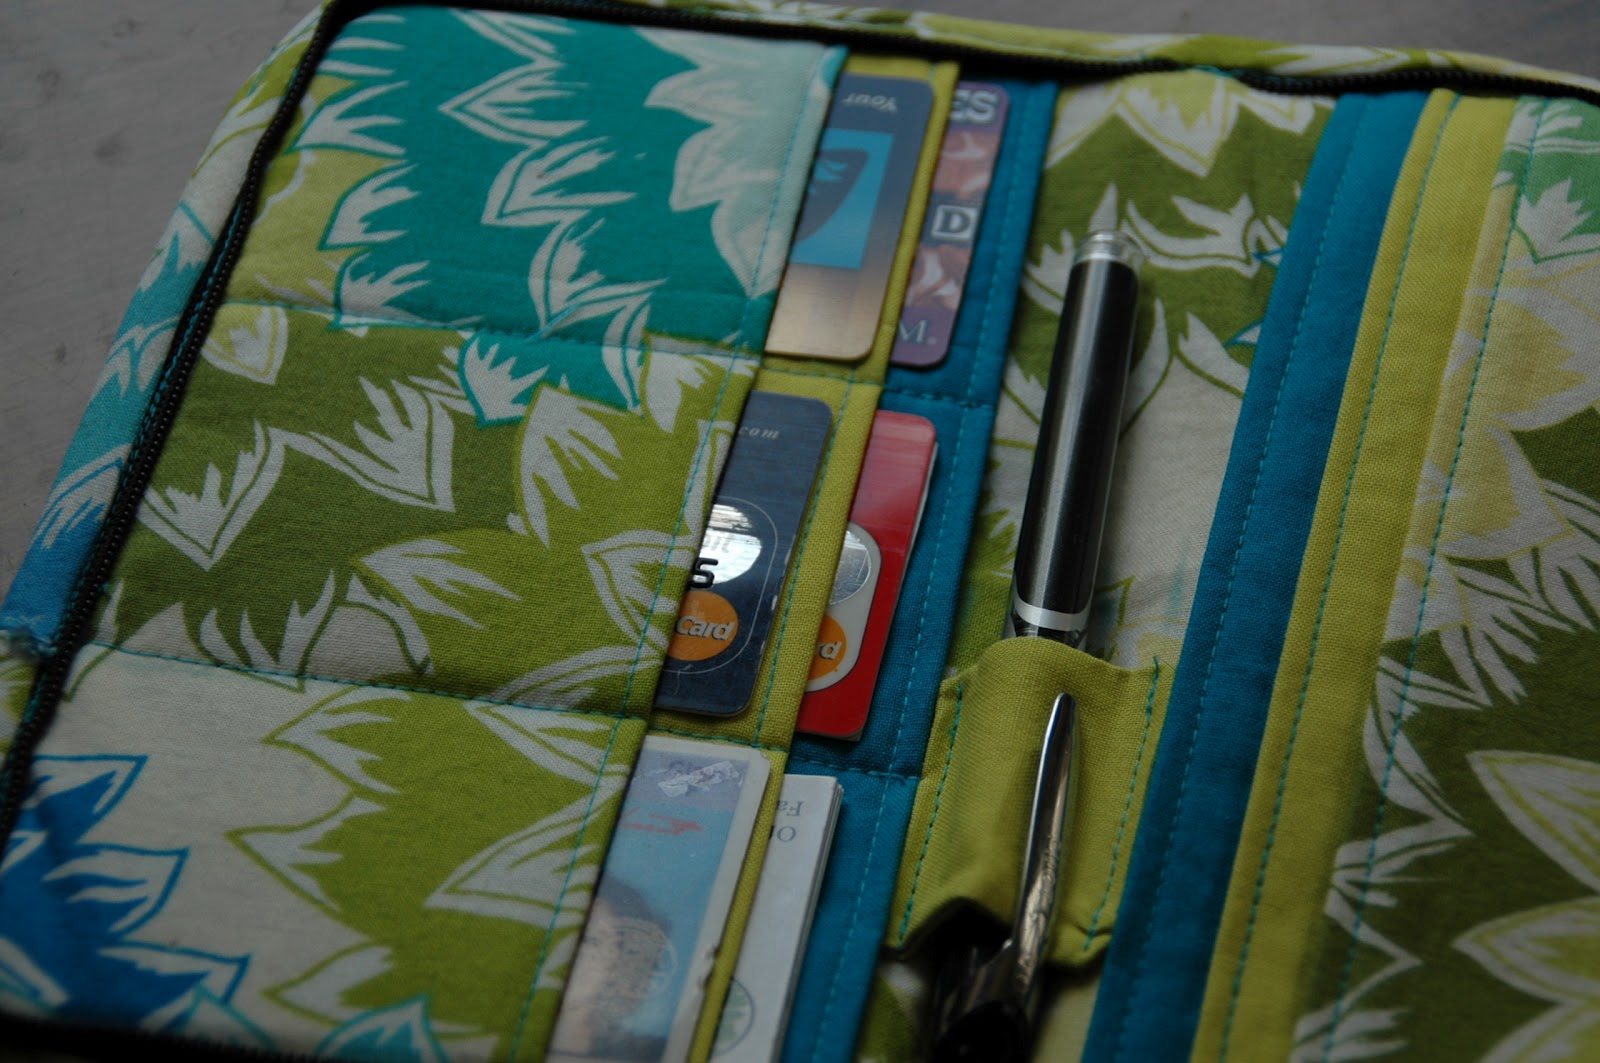
See?!  It's a cute little convertible diaper clutch!  Covered in snail-ios.  The pattern is from Fabric-by-Fabric One Yard Wonders.  It's a clutch, big enough to hold a couple of diapers, wipes, etc., AND it opens flat into a changing pad.  Pretty nifty, eh?


I've been enjoying working with metal hardware on my bags.  They add a nice finishing touch and they're durable!  Plus, it was fun to quilt some wonky lines on the clutch.  I figured that snails don't move in straight lines, so why should the quilt lines?


Above, you can see (sort of) the inner pocket for holding diapers and such.  I asked around and according to the moms I spoke to, they all agreed that they would have found a smaller, more portable bag really convenient for those quick trips out to the grocery store or whatever.  They didn't always need the giant diaper bag and this would have been nice.


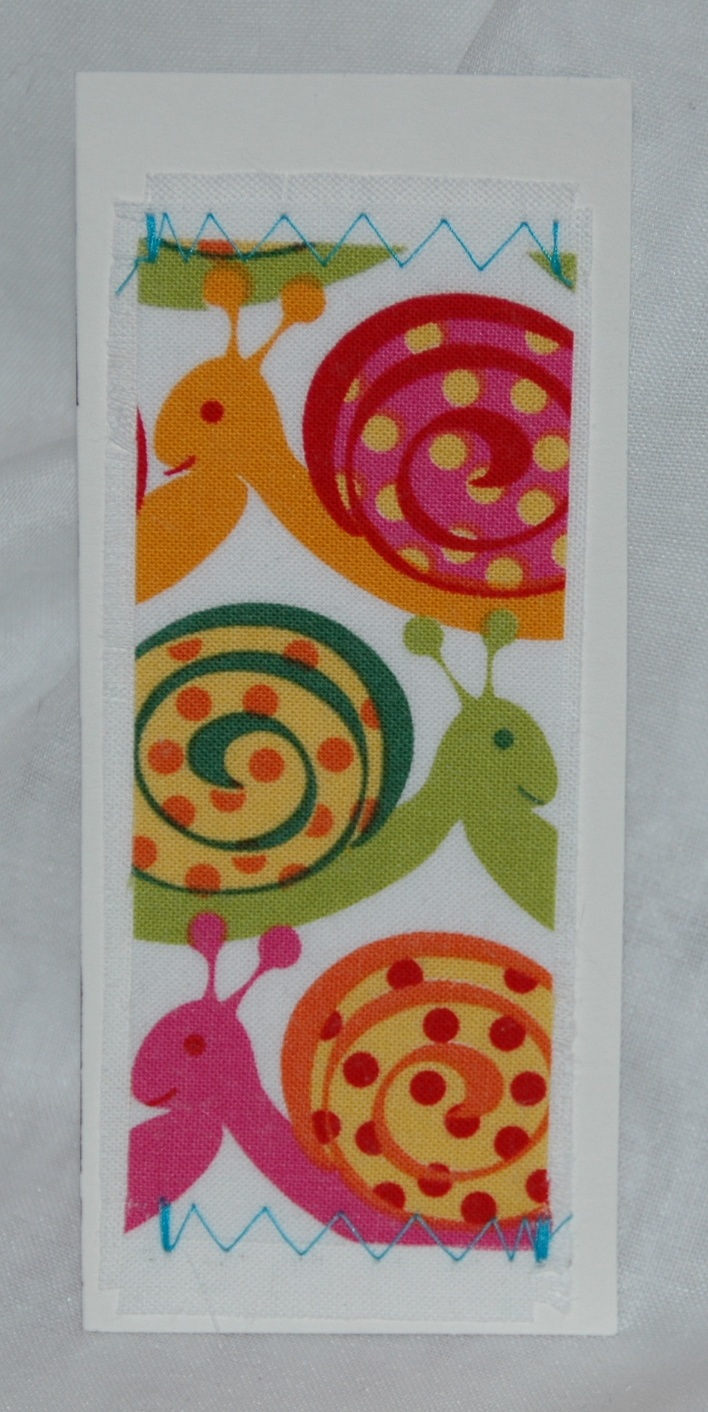
And I used a fabric scrap to make the gift tag/care instruction tag.

I hope the parents-to-be enjoy it!  And that the soon-to-arrive baby boy finds the pad comfy enough.

Tuesday, June 26, 2012

Grafitti Cardi

Well ... I made my first sewn garment.

AND I did it out of knit fabric.
(I know, right?!  WTF was I thinking?!  Apparently I like a challenge.  Or am just a masochist.  Potato-potahto.)


I took the project from Sewing In a Straight Line by Brett Bara.  It's the "First Time's a Charm Cardi" and it literally is like 7 rectangles.  SRSLY.  And two aren't even 100% necessary. *

I did read lots of tips from various books, blogs and such on working with knits, but they're still slippery little buggars.  I found this one at JoAnn's Fabrics - part of the April Johnston Project Runway line.  I love the grafitti!  (Believe it or not, the text actually all goes in one direction and I'm OCD enough to make sure ALL my panels, sleeves and facing are going the "right" way.)

Anyway, the construction is pretty straight forward.  The most difficult thing for me was working with the fabric itself.  You just have to slowly and carefully.

My cardi did end up being a little shorter than I would prefer and shorter than the pattern calls for.  When I got to hemming it I realized how much the back panel had shifted while I was cutting.  It was NOT even.  Not even a little.  So off came a chunk.

You live, you learn.  But if I decide I want it longer, I have some black knit that I can add at the bottom, almost like color-blocking.  It's all good ...


* Most knits don't really need to have "finished" edges as they won't unravel.  So one could choose to leave the facing off of the front edge if going for the whole casual/drapey look.  However, I did end up making the facing more of a band.  It made logical sense to me during assembly.  Besides, without the band, there's no way this would have even stood a chance of covering "the girls", if you know what I mean.  Note:  I actually DID do the facing right.  I was just tired at the time and thought I'd mucked it all up!  :)

Sunday, June 24, 2012

SEW It SEAMS I'm Making a Garment

Oh, come on.  You had to know that joke was coming at some point.

Anyway, I'm making my FIRST sewn garment.  It's a simple, kimono-sleeve cardigan from Sewing In a Straight Line by Brett Bara.  Why I chose to work with knits for my first garment ... well, I must be a glutton for punishment!  LOL

BUT so far it's going okay.  I read up on lots of tips about working with knits.  Using a piece of tissue paper between the fabric and the feed dogs is totally keeping the knit from getting sucked into the machine.  Plus, I figured out a few new things about stitch length/width with zig-zag stitches.  Fun, fun!  :)

And check out how smooth my seams are!  No puckering!  I'm pretty pleased about that!


Monday, June 18, 2012

Sunshine on a Cloudy Day ...

Sometimes when it rains, it pours.

I have a friend who I thought could use a little cheering up.  Just a little something to maybe shine a little light into a dark day ...


******************************

Ever since making this pin, I've been wanting to make more. 
Playing around with scraps and ribbon and cotton thread ... pieces evolve ... layers change.

I have it propped up on my new lamp.  Technically, it's an old lamp.  Painted a new fun color.  See my favorite lamp was sent to the great beyond by this little fella:


Erebos*, the handsome boy on the left, had a little ... erm, DERP! moment and took the glass -- the beautiful, orange, smooth, round glass -- lamp with him. 

I heard it happen, but I couldn't look. 
I didn't want to see it.
Seeing it would make it real.

I made Chris do it. 
He had to tell me that my favorite lamp was a goner.

Sigh.

On the plus side, no cats were injured in the breaking of the lamp.
Or in the subsequent moments following the breaking of the lamp.

He's lucky he's cute.

* Marishi is the girl on the right.  Ain't she pretty?

Sunday, June 17, 2012

Zakka Style Sew-A-Long: Week 11

ORCHARD PATH TWEED POUCH

This week's project was a pretty quick stitch.  Even with all the hand-sewing.  Yes, you heard that right - hand-sewing.  I did it.  And ... and ... I even LIKED it.  


The little hexagons were kinda fun.  I wish I had used the invisible thread to join the hexagons together.  It really does disappear.  I chose to hand-stitch the appliqués to the panel instead of machine stitch (using the invisible thread.)  I think it looks better and I like how it turned out.

The project called for some interfacing on the lining fabric, but I didn't really feel it needed it.  My wool exterior is fairly stiff and I don't really like the firm feeling on the lining.  So I just left the interfacing out.  I also didn't use another print for the lining and I limited it to two different prints for the hexagons.  I just didn't want that much going on since the wool is pretty heavily textured itself.  I wasn't sure I'd like the little corner patches, but I kinda like 'em on this bag.

Since my zipper was a little short (7" instead of the listed 9") I added fabric tabs before inserting.


Sunday, June 10, 2012

Zakka Style Sew-A-Long: Week 10

ZIP ORGANIZER

Well ... parts of this project were fun. 

Breaking two needles in a row. 
Unpicking stitches gone astray due to the thickness of the layers.
Those, not so much fun.

I probably shouldn't have used denim for the exterior. 
Too heavy.

Shouldn't have used fusible fleece for the exterior interfacing.
Too poofy.

IF (and that's a big IF) I make this again, I will use something lighter-weight for the exterior with a firm, but thinner interfacing.  I just really wanted to make this wallet/organizer to match my Big-Ass Denim Bag.


Sigh.
It's okay.  I like it well enough.


I found that installing the zipper was a heck of a lot easier without pinning in place.  Pinning something this thick was a nightmare.  Everything wanted to shift because it was so thick.  I just had to go slow and line everything up as I went.  I'd clip and place the corners as I got to them.  Yes, I had to stop and start a few times, but I found it easier this way.


I did take the advice of one of the other bloggers and stitch the back zip pocket closed so items wouldn't shift around to the wrong end.  I didn't get a good picture of it.  Sorry.  But this is why I "quilted" the exterior to hide the stitch line.
Please pay no attention to the wonky binding.  This thing was too thick for the listed width of binding.  Nightmare.  Ugh. 

It's fine.
It's functional.

Saturday, June 9, 2012

Sometimes It's the Little Things ...

So you know how when you buy a fabric tape measurer, it only comes with some dinky little cardboard sleeve to hold it together? 

Yeah. 
Like that works for long.

Then you end up with a fabric tape that's always a tangled mess in your sewing box.  Or on the table.  Or on the floor.  Not that I know what that's like .... ahem.

Anyway, it's annoying.

So I had some fabric scraps lying around ... idea popped into my head ... and VOILÀ!  An (almost) instant fabric-tape-measurer-holder-together-er was born!


Sometimes, it really IS the little things ...


(Oh, shush!  I was bored.  And procrastinating about another project.)

Sunday, June 3, 2012

Zakka Style Sew-A-Long: Week 9

STEM MESSENGER BAG

Yeah, yeah, yeah ... I missed two weeks of projects.
I know.  Time and traveling just didn't allow it to happen.
Kinda bummed, too.  Week 8 was a quilt that I was DYING to make.
I still will.  Just not right now.

BUT I did have time (barely) to do the project for Week 9 - The Stem Messenger Bag.  However, messenger bags aren't really "me."  The flap gets in my way or I'm always flipping it the wrong way or I can never get the snap to line up.  Messenger bags just don't work for me.  I loved the petals though.  So I revamped and came up with something that works for me.


The project also called for machine-stitched appliqué that I really don't think will hold up well to all the wear and tear a bag or purse gets.  Something always rubbing against the edges.  PLUS I've been wanting to try a seamed edge, reverse appliqué technique that  I saw in Modern Patchwork magazine.  I'm pretty pleased with my first attempt at this.  The linen stretches, so it may not have been ideal for this project.  The edges of the shapes are a little  wonky, but not terrible.


As you can see, I did add a "flap" ... it's just to keep the bag closed.  Uses a magnetic snap on the inside to attach to.  Ever since I added metal hardware to this bag, I've been wanting to use more.  So I used the metal rings to attach the strap tabs to the bag, then I could add the actual strap after.  This is much, much easier when turning the bag right-side out as the whole strap isn't in the way.


Instead of adding gussets to "box" the bottom of the bag, I added an entire panel.  This actually ended up being much easier than I thought it would be!  Did it to the lining, too.  Since the front panel was fairly small, I knew that adding a gusset would mean the front panel would end up wrapping around the bottom and sides, so I added the panel for depth.